• Tapered Pins

    From Bob La Londe@21:1/5 to All on Fri Jul 19 16:17:23 2024
    .. of course I can make my own but for a one off project, but for a
    repeat stock job I would like to buy them premade.


    I'm cutting a mold for somebody that casts a body with a through hole.
    There are nominal dimensions, but a tapered pin that knocks out easily
    would be acceptable. I can buy "standard" tapered pins and "standard"
    tapered reamers, but when I was trying to spec it out it seems the pins
    are available in sizes ranging down much smaller than the small end of
    the reamer. Or in other words, "WHAT?!?"

    I went ahead and bought a couple sizes of pins that would be suitable
    for the casting, and a 0-10 set of tapered reamers. I don't know how
    its going to work out, but I figure if worse comes to worse maybe I can
    make a tapered D-Bit reamer that actually matches the pins.

    --
    Bob La Londe
    CNC Molds N Stuff

    --
    This email has been checked for viruses by AVG antivirus software.
    www.avg.com

    --- SoupGate-Win32 v1.05
    * Origin: fsxNet Usenet Gateway (21:1/5)
  • From pyotr filipivich@21:1/5 to All on Sat Jul 20 09:00:18 2024
    "Jim Wilkins" <muratlanne@gmail.com> on Fri, 19 Jul 2024 20:46:02
    -0400 typed in rec.crafts.metalworking the following:

    South Bend used taper pins on my lathe, some of which didn't survive the >students' abuse. I acquired some spare parts which had been drilled >differently for the taper pins. It seemed to me the idea was to ream by >hand, tap in the pin and then cut off the excess.

    I still have a batch of brass taper pins made for the class
    machines. Brass shears off and protects the machine - at leas that is
    the theory
    --
    pyotr filipivich
    "With Age comes Wisdom. Although far too often, Age travels alone."

    --- SoupGate-Win32 v1.05
    * Origin: fsxNet Usenet Gateway (21:1/5)
  • From Bob La Londe@21:1/5 to pyotr filipivich on Sat Jul 20 15:27:21 2024
    On 7/20/2024 9:00 AM, pyotr filipivich wrote:
    "Jim Wilkins" <muratlanne@gmail.com> on Fri, 19 Jul 2024 20:46:02
    -0400 typed in rec.crafts.metalworking the following:

    South Bend used taper pins on my lathe, some of which didn't survive the
    students' abuse. I acquired some spare parts which had been drilled
    differently for the taper pins. It seemed to me the idea was to ream by
    hand, tap in the pin and then cut off the excess.

    I still have a batch of brass taper pins made for the class
    machines. Brass shears off and protects the machine - at leas that is
    the theory

    The thing is there really isn't any point to having stock size taper
    pins available more than minimally longer than you can ream. I was
    excited to see a couple pins available that might fit my application
    only to find I would have to create my own tool to ream the holes. I
    can make my own tools, but it takes a lot of time.


    --
    Bob La Londe
    CNC Molds N Stuff


    --
    This email has been checked for viruses by AVG antivirus software.
    www.avg.com

    --- SoupGate-Win32 v1.05
    * Origin: fsxNet Usenet Gateway (21:1/5)
  • From pyotr filipivich@21:1/5 to All on Sun Jul 21 16:25:30 2024
    Bob La Londe <none@none.com99> on Sat, 20 Jul 2024 15:27:21 -0700
    typed in rec.crafts.metalworking the following:
    On 7/20/2024 9:00 AM, pyotr filipivich wrote:
    "Jim Wilkins" <muratlanne@gmail.com> on Fri, 19 Jul 2024 20:46:02
    -0400 typed in rec.crafts.metalworking the following:

    South Bend used taper pins on my lathe, some of which didn't survive the >>> students' abuse. I acquired some spare parts which had been drilled
    differently for the taper pins. It seemed to me the idea was to ream by >>> hand, tap in the pin and then cut off the excess.

    I still have a batch of brass taper pins made for the class
    machines. Brass shears off and protects the machine - at leas that is
    the theory

    The thing is there really isn't any point to having stock size taper
    pins available more than minimally longer than you can ream. I was
    excited to see a couple pins available that might fit my application
    only to find I would have to create my own tool to ream the holes. I
    can make my own tools, but it takes a lot of time.

    I know that feeling. Is what it would cost more or less than what
    I would spend making one? And how soon do I need 'it'?
    --
    pyotr filipivich
    "With Age comes Wisdom. Although far too often, Age travels alone."

    --- SoupGate-Win32 v1.05
    * Origin: fsxNet Usenet Gateway (21:1/5)
  • From Bob La Londe@21:1/5 to Bob La Londe on Mon Jul 22 11:44:08 2024
    On 7/20/2024 3:27 PM, Bob La Londe wrote:
    On 7/20/2024 9:00 AM, pyotr filipivich wrote:
    "Jim Wilkins" <muratlanne@gmail.com> on Fri, 19 Jul 2024 20:46:02
    -0400 typed in rec.crafts.metalworking  the following:

    South Bend used taper pins on my lathe, some of which didn't survive the >>> students' abuse. I acquired some spare parts which had been drilled
    differently for the taper pins.  It seemed to me the idea was to ream by >>> hand, tap in the pin and then cut off the excess.

        I still have a batch of brass taper pins made for the class
    machines.  Brass shears off and protects the machine - at leas that is
    the theory

    The thing is there really isn't any point to having stock size taper
    pins available more than minimally longer than you can ream.  I was
    excited to see a couple pins available that might fit my application
    only to find I would have to create my own tool to ream the holes.  I
    can make my own tools, but it takes a lot of time.


    I'm an idiot. Since the taper is the same 1:50 for inch tapers and 1:48
    for metric tapers of all "standard" taper pins I can just use an "off"
    size reamer to finish out the hole. Doh!
    --
    Bob La Londe
    CNC Molds N Stuff


    --
    This email has been checked for viruses by AVG antivirus software.
    www.avg.com

    --- SoupGate-Win32 v1.05
    * Origin: fsxNet Usenet Gateway (21:1/5)
  • From Bob La Londe@21:1/5 to Bob La Londe on Mon Jul 22 16:38:37 2024
    On 7/22/2024 4:23 PM, Bob La Londe wrote:
    On 7/22/2024 3:30 PM, Jim Wilkins wrote:
    "pyotr filipivich"  wrote in message
    news:9s5r9j9cjpgoerl1k0v0h6e12numoa5rvk@4ax.com...

    I know that feeling.  Is what it would cost more or less than what
    I would spend making one?  And how soon do I need 'it'?

    I have 4 drill presses.  Maybe 5 if you count the little mill/drill.  I rarely use any them anymore.  Most drilling gets done with one of the
    CNC Mills followed probably by a hand held drill motor these days.  I
    very rarely finish a tapped hole with a tapping head.  However, do use
    the floor drill press once in a while.  Sometimes its just the fastest
    and easiest way to waller out a hole in something.  I've got a few drill press vises, but tended to use a "CNC" mill vise more often as its much heavier, and can be squared up on the table in any orientation.

    A couple Christmas holidays ago my son and I made a slide lock drill
    press vise and gave it to my dad for Christmas.  As far as I know he
    never used it.  I did put it on his drill press once when I was out that way, but there is no sign he ever used it.  When I started cleaning out
    his shop I brought it home and put it on my floor stand drill press.
    Once you get a feel for how to use it (wish it had a faster screw) its a pretty amazing device.  I haven't used any other vise on that drill
    press since.  I machined two grooves and a step in the jaws.  So far it
    has worked for most everything I've drilled on that machine.

    All of that being said for manual drilling I use the knee mill much more often than I use a drill press.  I might use it more if I put a slide
    lock drill press vise on it too.  LOL.

    https://www.yumabassman.com/wp-content/uploads/2024/07/20240722_161219.jpg https://www.yumabassman.com/wp-content/uploads/2024/07/20240722_161253.jpg https://www.yumabassman.com/wp-content/uploads/2024/07/20240722_161324.jpg

    One thing I would change is to set the bars and screw in the middle of
    the split clamp instead of above center.

    I have it set so it angles down towards the jaws slightly so when the
    split clamp is tighten the bottom of the jaws put slight pressure on the
    table.

    Often when finding a hole with a punch mark, I'll put the drill in the
    punch mark, and then tighten the split clamp.

    --
    Bob La Londe
    CNC Molds N Stuff


    --
    This email has been checked for viruses by AVG antivirus software.
    www.avg.com

    --- SoupGate-Win32 v1.05
    * Origin: fsxNet Usenet Gateway (21:1/5)
  • From Bob La Londe@21:1/5 to Jim Wilkins on Mon Jul 22 16:23:44 2024
    On 7/22/2024 3:30 PM, Jim Wilkins wrote:
    "pyotr filipivich"  wrote in message news:9s5r9j9cjpgoerl1k0v0h6e12numoa5rvk@4ax.com...

    I know that feeling.  Is what it would cost more or less than what
    I would spend making one?  And how soon do I need 'it'?

    I have 4 drill presses. Maybe 5 if you count the little mill/drill. I
    rarely use any them anymore. Most drilling gets done with one of the
    CNC Mills followed probably by a hand held drill motor these days. I
    very rarely finish a tapped hole with a tapping head. However, do use
    the floor drill press once in a while. Sometimes its just the fastest
    and easiest way to waller out a hole in something. I've got a few drill
    press vises, but tended to use a "CNC" mill vise more often as its much heavier, and can be squared up on the table in any orientation.

    A couple Christmas holidays ago my son and I made a slide lock drill
    press vise and gave it to my dad for Christmas. As far as I know he
    never used it. I did put it on his drill press once when I was out that
    way, but there is no sign he ever used it. When I started cleaning out
    his shop I brought it home and put it on my floor stand drill press.
    Once you get a feel for how to use it (wish it had a faster screw) its a
    pretty amazing device. I haven't used any other vise on that drill
    press since. I machined two grooves and a step in the jaws. So far it
    has worked for most everything I've drilled on that machine.

    All of that being said for manual drilling I use the knee mill much more
    often than I use a drill press. I might use it more if I put a slide
    lock drill press vise on it too. LOL.

    https://www.yumabassman.com/wp-content/uploads/2024/07/20240722_161219.jpg https://www.yumabassman.com/wp-content/uploads/2024/07/20240722_161253.jpg https://www.yumabassman.com/wp-content/uploads/2024/07/20240722_161324.jpg


    --
    Bob La Londe
    CNC Molds N Stuff


    --
    This email has been checked for viruses by AVG antivirus software.
    www.avg.com

    --- SoupGate-Win32 v1.05
    * Origin: fsxNet Usenet Gateway (21:1/5)
  • From Bob La Londe@21:1/5 to Jim Wilkins on Tue Jul 23 11:56:17 2024
    On 7/23/2024 6:15 AM, Jim Wilkins wrote:

    I didn't suggest following with a second smaller reamer because I
    couldn't think of a way to ensure it aligned with the first radially and axially, the necessary extended shank could let it wander and there's no
    easy way to know when to stop.

    Milling machine does a fair job with alignment as long as you don't move anything. The reamer will follow the existing hole.

    There is a saying, "Drill fast, bore straight, ream to size." Somebody
    else must have said it first, but I've never heard anybody else say it
    exactly that way. For now I am the guy who said that saying until
    somebody tells me different.

    It's a mold so depth is easy to find. Just open the mold and look. The
    pin slot was already 3D machined fairly accurately. 0+ to -.001 or
    better anywhere along the slot. The reamer(s) just needs to kiss the
    hole to make it a smidgen smoother. Its a lead casting mold so as long
    as the pin sets at "about" the right position castings will come out
    fine. You don't get flashing with upto .004-005 gaps unless the mold
    and lead are overheated. I vent .0015 to .003 every day without issues
    on gravity casting lead molds. (Resins and injection have their own set
    of issues and tolerances.)

    I have already tested fit without reamer cleanup and it "would work" as
    is. I'd just like it to set set a little deeper for ease of dropping in
    the pin. I think just kissing off the machine marks from the original
    3D op will be just right.

    I'd ream to position the large head of
    the pin relative to the surface, cut off the small end and bin it for
    later. For a small pin in a deep hole I'd use a dowel or roll pin instead.


    A straight pin would work, but the customer wants a taper pin because it
    will theoretically knock out easier. It will. With a straight pin you
    have to DRAG the pin out of the casting for the entire length. With a
    taper pin a light tap with a soft face hammer and it just falls out.

    ***
    I'm cutting a mold for somebody that casts a body with a through hole.
    There are nominal dimensions, but a tapered pin that knocks out easily
    would be acceptable.
    ***

    I may not have done an adequate job of describing the application. The
    taper pin is not for "joining" or "aligning." Its to be used as a
    removable core.

    FYI: I make similar casting molds all the time with straight pin cores,
    and they work just fine. They do require more effort to remove, but
    they work just fine. In this case its a custom mold, the customer has
    no experience with lead casting, and they are a bit OCD. Its easier to
    charge them for the work than to argue with them and it needlessly burns
    less of my time.

    Similar mold I make with straight pins larger and longer than the custom
    mold above. https://www.cncmolds.com/webstore/lead-casting-molds/weights-lead-line-for-nets/ten-count/weight-net-sinker-1/4-pin-4-cavity


    Hammerlock chain links have another way to retain a pin. It's turned
    smaller in the center and passes through a nested pair of large split
    roll pins with their slots opposed. They expand to let the end pass,
    then shrink onto the smaller center. Unlike shackles one end is no
    larger than the bow and fits into chain links. The pin is fairly easy to hammer or squeeze in and punch out. https://www.riggingwarehouse.com/rw-lifting-rigging-hardware/rw-connection-repair-links/rw-hammerlocks.html

    This is the preferred fitting to splice one chain to another,
    hammerlocks are wider to accept multiple chains for slings. https://www.etrailer.com/Accessories-and-Parts/Titan~Chain/TCML13.html?feed=npn&gad_source=1

    I had to go beyond hardware store G30 chain to a logging equipment
    supplier to upgrade my hoisting gear for the heavy logs.

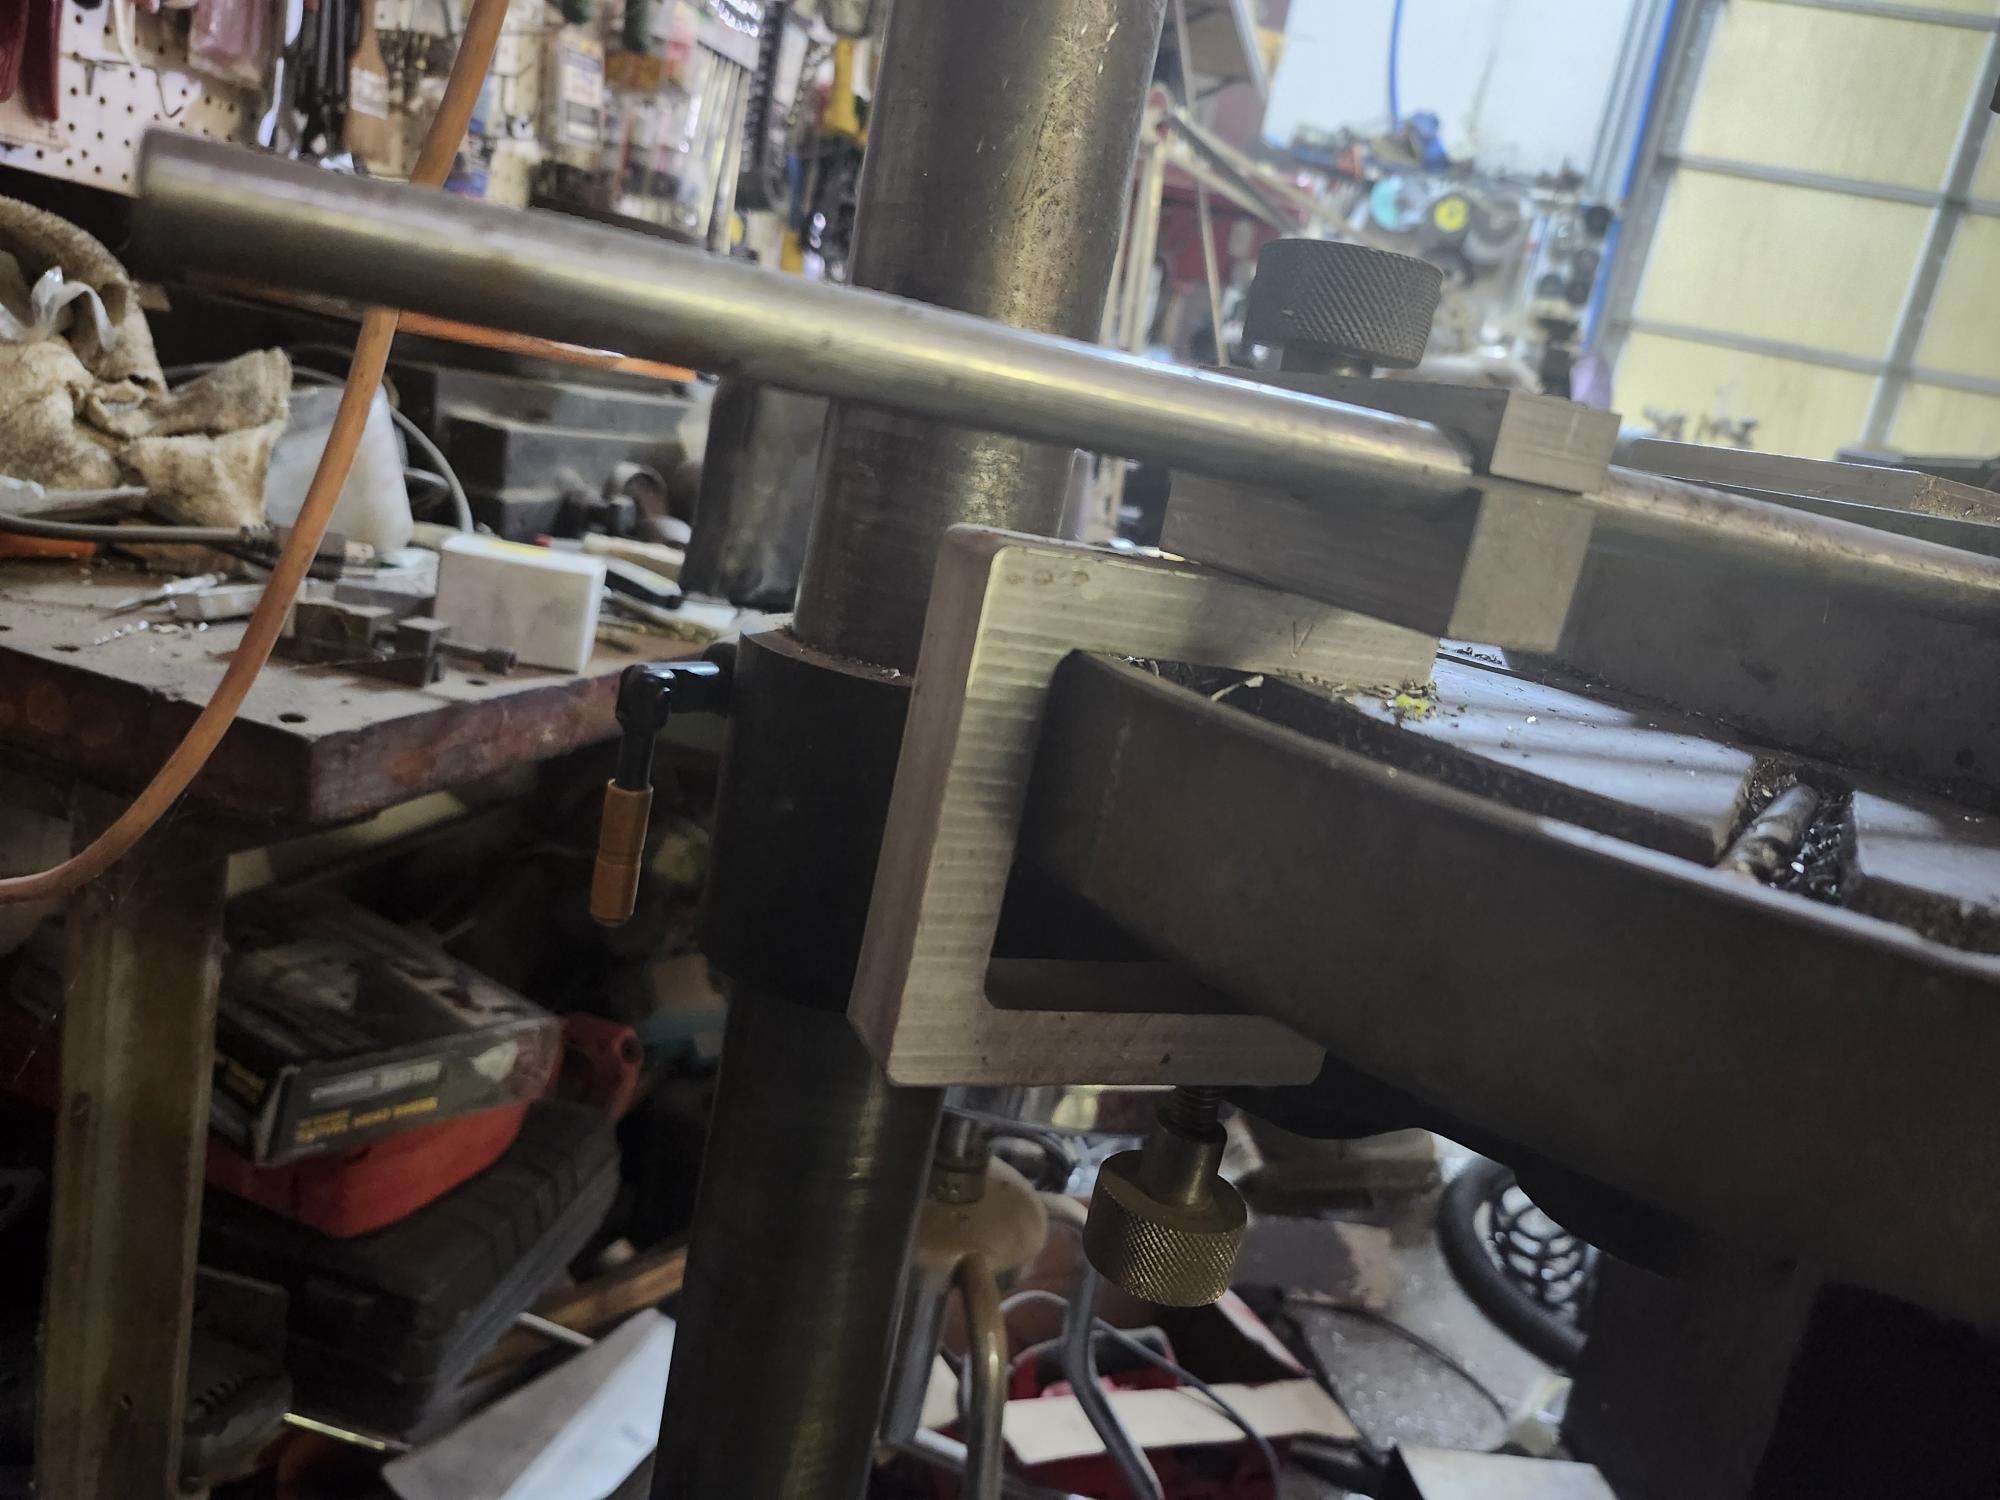
    The drill press vise would be for the mill, to hold large but light
    material, mainly sheet metal for electronic control panels etc, plus
    give more badly needed working space under the spindle for upright jobs
    like 5C collet blocks.

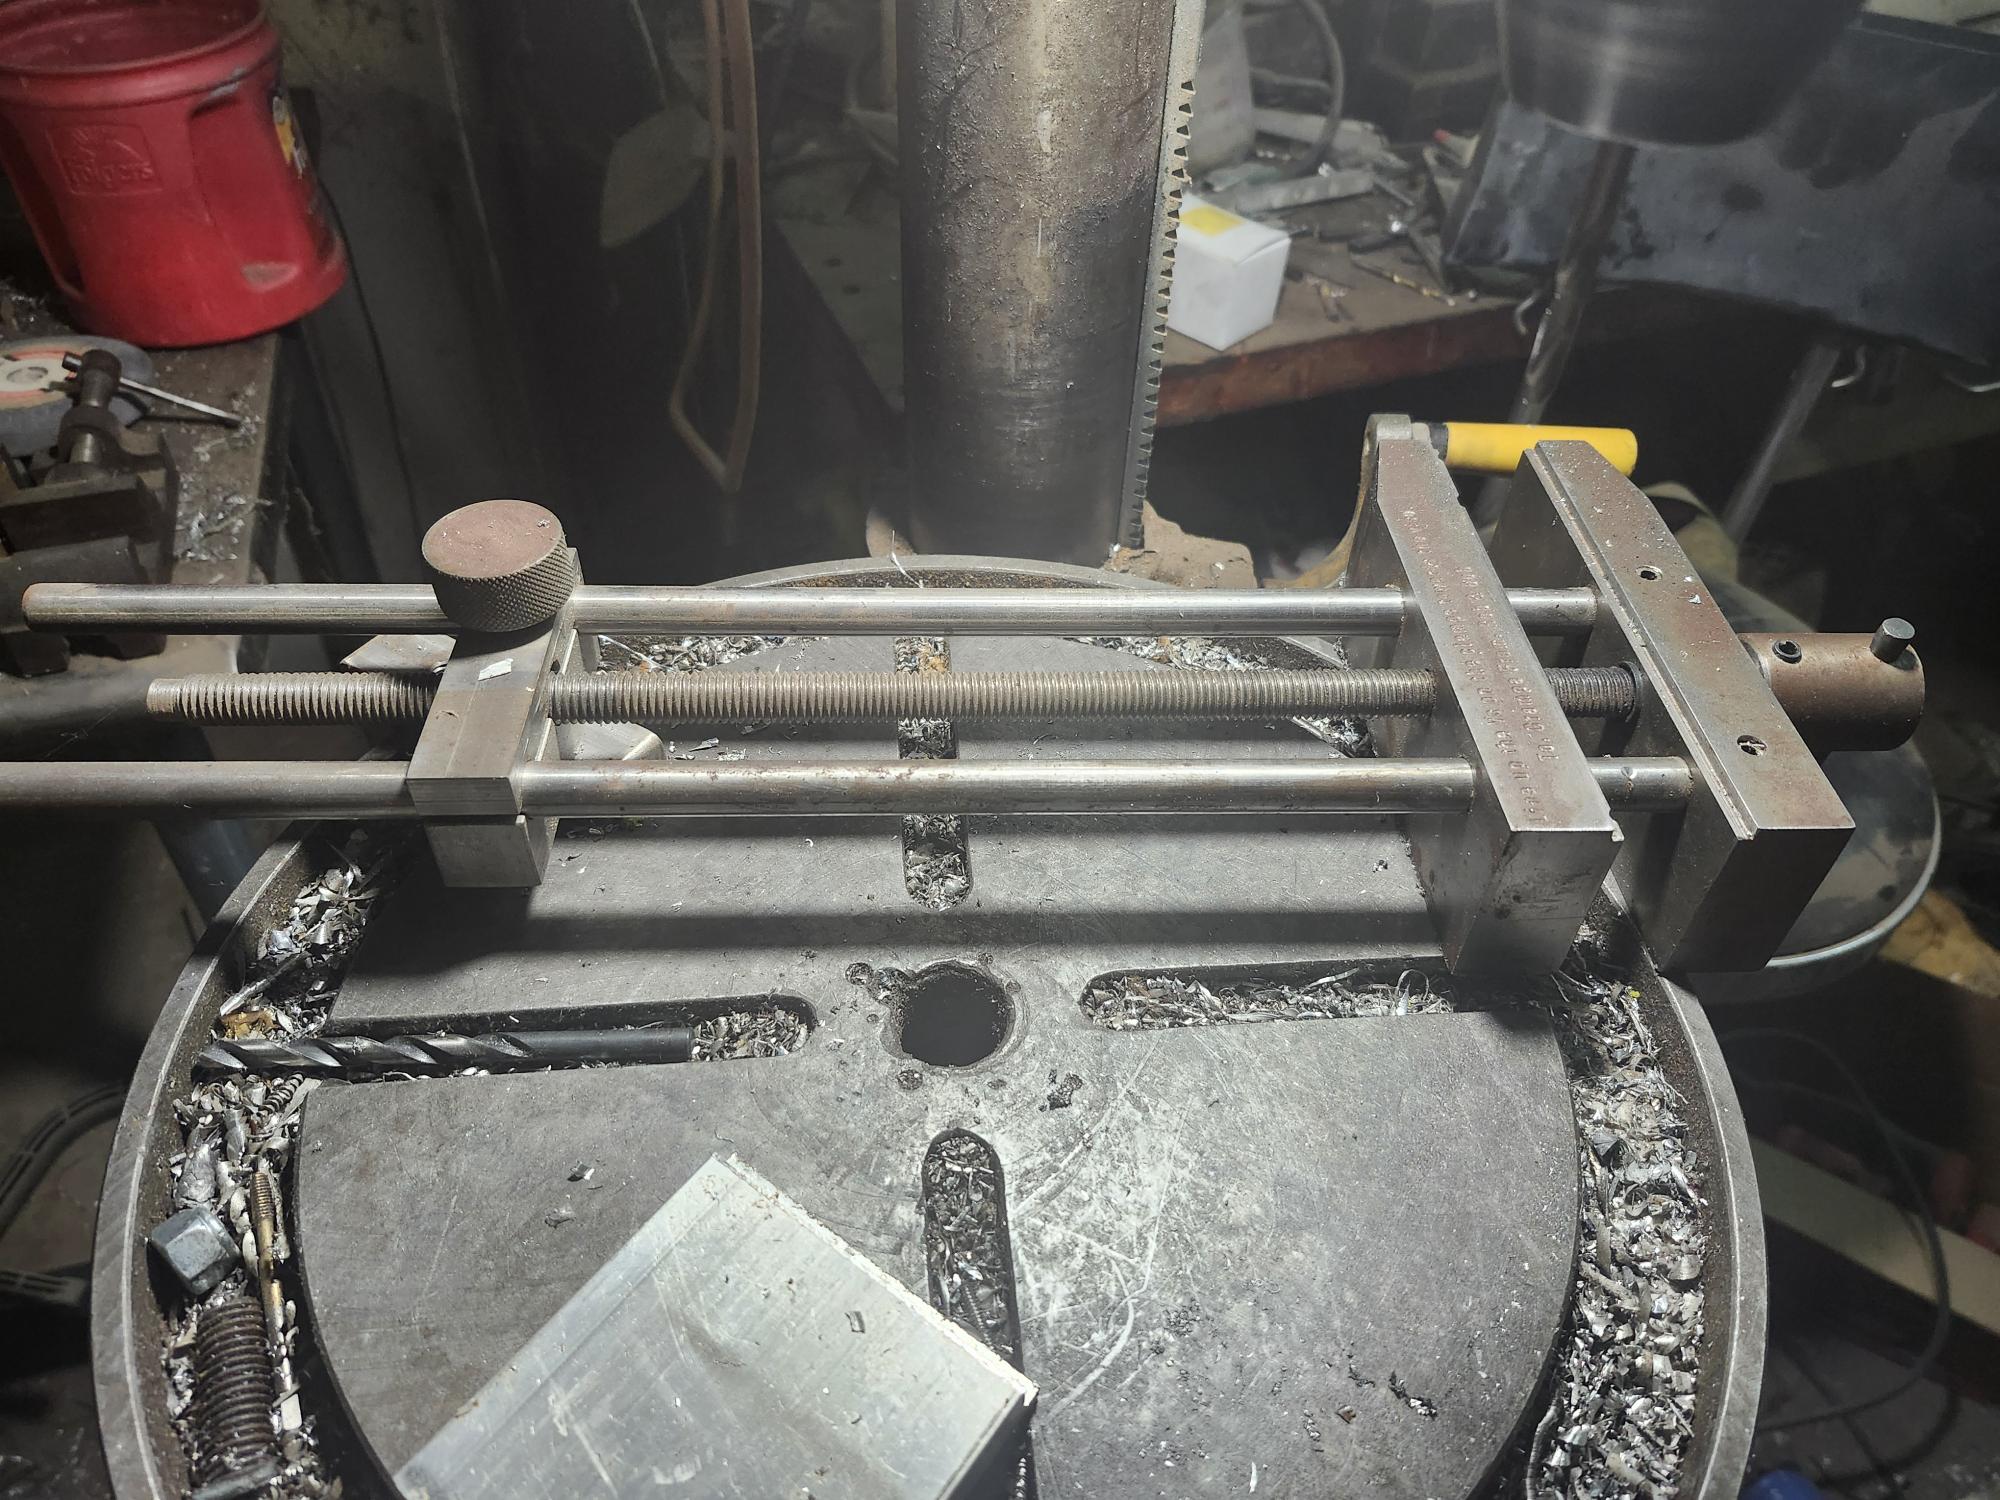
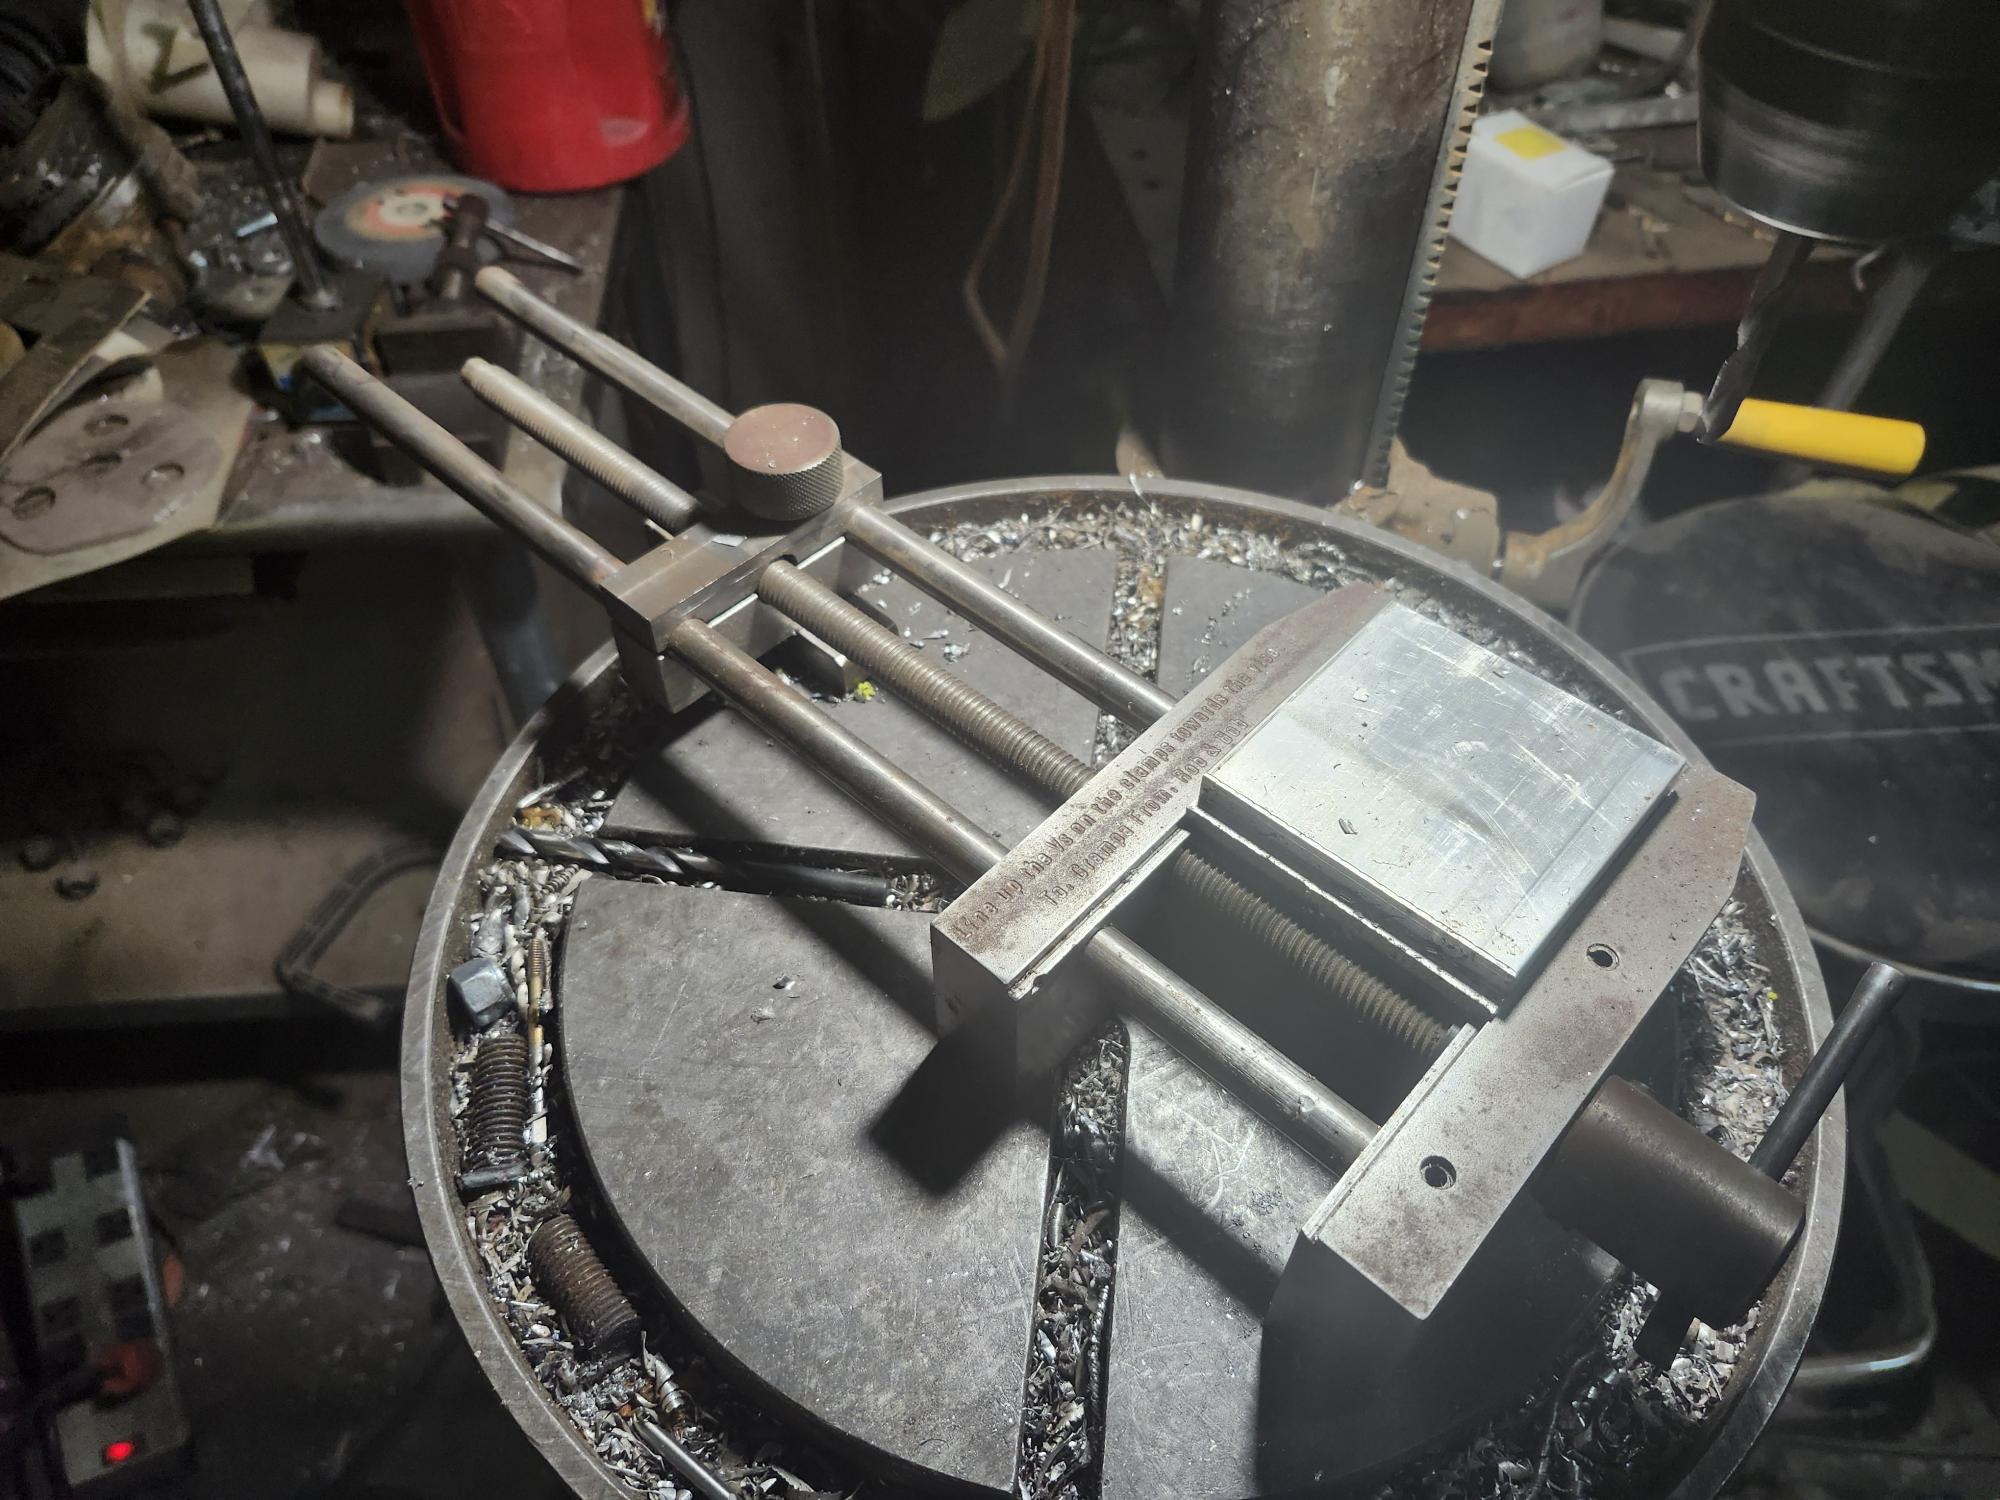
    Did you look a the slide lock vise? I have actually thought about
    making a second one to go on the South Bend mill. In a t-slot table the clamping screw for the split block could also lock it to the table with
    a t-nut making all adjustment and movement fast and easy from the top of
    the table. When I don't need it I can just loosen the knob and slide it
    out of the way.

    I don't know how flimsy of material you plan to drill, but anything
    heavy enough to not buckle when clamped in a vise works in the step jaw
    just fine. I drill aluminum sheet as thin as .080 as needed. depending
    on the alloy could go thinner. Much thinner and I use double stick tape
    or painters tape and super glue to a backer. The sacrificial backer
    would then clamp up in the vise just fine. They are small. but there is
    a vertical groove and a horizontal groove milled in the moving jaw of
    the vise for round stock, and there is no reason I couldn't use a 5C
    collet block in it either.

    For reference. I once made a fixture for milling paper. Plane old
    ordinary .003 thick printer paper. Talked about it on this group. I
    used it to create neatly printed custom button labels for a hybrid phone
    system back when I was still contracting.

    My Clausing 8525 mill is the early version
    without the column riser block.

    Its my understanding that riser blocks for mills were options. Not
    included. You unbolt the head, lift it up, slap in the riser block, and
    bolt it back together. I wouldn't mind an additional six inches on my
    South Bend, but usually I can bolt on a right angle plate, and hang the
    part off the table if I need to drill something longer than my Z
    clearance. I have to swing the head to one side so the long part can
    clear the knee, but its made to do that.

    I had to remove the hard jaws to clamp 6
    squares of 5" wide 14 ga steel for a hole saw, and wider steel would
    have been better for hoist baseplates.  At Unitrode I replaced a
    worn-out drill press with an RF-31 mill

    I had an RF-31 for a while. I didn't get much use out of it, but I seem
    to use my South Bend knee mill a lot. A true 5HP (Running on 7.5hp VFD) spindle makes short work of some roughing and truing jobs even if I do
    have to turn the handles.

    drill and bought an 18 lb 6"
    drill press vise for it instead of a 70+ lb milling vise that could
    crush a foot. Machine work for electronics is mainly on aluminum sheet
    and light extrusions, and no one wears steel toe boots.

    The big advantage of the slide lock is it can't spin, its light weight,
    and its easily removed or installed. Of course you can make it any size
    you need.


    --
    Bob La Londe
    CNC Molds N Stuff


    --
    This email has been checked for viruses by AVG antivirus software.
    www.avg.com

    --- SoupGate-Win32 v1.05
    * Origin: fsxNet Usenet Gateway (21:1/5)
  • From Bob La Londe@21:1/5 to Jim Wilkins on Tue Jul 23 16:05:45 2024
    On 7/23/2024 1:57 PM, Jim Wilkins wrote:
    Bob La Londe"  wrote in message news:v7oucg$1ajjv$1@dont-email.me...

    On 7/23/2024 6:15 AM, Jim Wilkins wrote:

    Did you look a the slide lock vise?

    ---------------------------------------
    I have used one that I wasn’t all that impressed with, mainly for the limited range and sensitivity of clamping forces. I drill and mill
    0.030" aluminum and clear plastic, usually over a wood backer it may or
    may not be attached to, with tee slot clamp hold-downs as needed. An
    example is cutouts for the rectangular panel meters I've mentioned.
    0.030" is stiff enough after being folded into a box.


    I had to use it a couple times before I got a feel for it. Now it just
    stays on the drill press all the time. If it had a quick release jaw it
    would be even better. Remember. You make it any way you need it. I
    made the one I posted pictures of as a "universal", but I might make it differently if I had a particular application for it. The biggest thing
    I like about it is it almost totally eliminates any chance of the
    spinning saw blade.

    --
    Bob La Londe
    CNC Molds N Stuff


    --
    This email has been checked for viruses by AVG antivirus software.
    www.avg.com

    --- SoupGate-Win32 v1.05
    * Origin: fsxNet Usenet Gateway (21:1/5)